Posts

Showing posts from October, 2021

Pathfinder build notes

Image
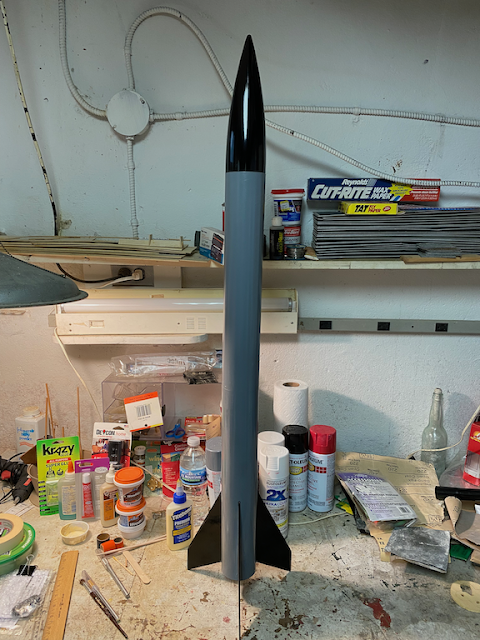
The Estes Pathinder was a Skill level 3 kit, kit #1997, sold from 1988-1990.   I bought it at my local Ace Hardware store for $10.99, probably in 1999 or 2000, and left it on my shelf for 18 or more years.   The kit states you should only fly it on D engines, but I plan on modifying it to also fly with E engines (same diameter but an inch longer) First I upgraded the 2.75” engine mount tube & D hook to 4” 24 mm E engine tube.  Using super glue I glued on the 24 mm screw off engine retaine r.  I also glued an engine block at the top of the engine mount tube. When building the Pathfinder I decided to use my Estes fin alignment guide for the first time to attach all four fins at once.  The guide is something I bought and forgot about (it was buried in the parts box). After assembly was finished I recognized that one fin was attached a quarter inch below the other three. I decided to live with it…. It turns out that Estes included the WRONG launch lug in my kit!  I realized this after

Finally building my first V2

Image
This is a Skill level 4, D powered Estes kit. #1904; a similar current kit (#3228) sold for $26.99 in 2020.   There was an o riginal 1904 kit listed for $70 at https://www.launchlabrocketry.com/shop/the-vault 9/22/21.   I f ound my original Commonwealth receipt from when I purchased mine for $29.99 on 7/6/2000. I’ve always wanted to build a V2, not because of it’s use in WWII but because it was the basis, after the war, of jump starting the American space program.  As such, I spent a lot of time looking at different paint patterns for the V2, since I didn't want to do a camouflage pattern for war, before settling on the final yellow and black scheme.   I bought this kit in 2000, but it was a reissue of an earlier kit from 1984 (and has since been re-reissued).  They included the original 1984 20-step instructions with a cover page describing the new engine hook they provided and a few other minor updates.  This kit was designed to fly on a D12 engine, but I decided to modify it t

SpaceShipOne

Image
For my next project I decided to build the Ansari X Prize winning SpaceshipOne, a Skill level kit 2, #2191 (from 2004), reported to go 400’ on C6-3.   I paid $16.99 in 2004 and had it sitting on my shelf.   I actually got to stand next to the real SpaceShipOne and it's mother ship on July 30, 2005 at the Oshkosh experimental aircraft fly in; SpaceShipOne and it’s mother ship were on their way to Washington DC to their permanent home in the Smithsonian Air & Space Museum. Estes had a couple of versions of the SpaceShipOne, including a Ready To Fly version, a foam body version and my version with a short body tube, plastic nose cone and tail section you have to saw apart, and lots of balsa fins and stickers. While building this kit, I had some issues with the plastic cement used to retain the engine mount causing the rear boat tail to collapse, so I tried to fill the surface with wood putty and sand.  I ended up priming, sanding, and painting the whole rocket white.  The Estes in

Software for Model Rocketry

Image
I’m a geek and my day job involves writing a lot of computer software so of course I’m drawn to the use of software to improve my rockets.   As a fan of open source software (i.e., free) I was naturally drawn to OpenRocket .    This allows me to use (most) simulation files developed using the commercial software, RockSim by Apogee Components , which I’ll probably break down and buy soon because it’s got really cool features, like printing nose cones and other parts if you’ve got access to a 3D printer (our library has a 3D printer so I may see what I can do with a trial version Rocksim).   For my current needs, OpenRocket allows me to simulate launching my rockets on different sized engines with different delays before parachute deployment.   In the past, I would have to guess whether to use a certain engine and, occasionally, would lose a rocket or have the parachute shred upon opening. RocketReviews is a great web site where other hobbyists describe modifications or issues building

First launch in (too) many years

On Sunday afternoon, 9/12/21, I went to the field between our middle school and junior high.   My neighbors and their daughter came to watch and help retrieve rockets.    I set up my launch pad near third base on an empty baseball field ; there was a baseball game on the field to the left and a soccer game on the field past right field. My first attempt to launch was the new Estes Patriot .  It was windier than I would have liked, so I went with a B6-4 with a projected altitude of about 250’.  After three or four countdowns it was clear the engine wouldn’t ignite.  I used several igniters because the pyrogen on the tip was crumbling off.   I switched to the new Astrocam with the digital camera on a new B6-4, projected to go about 350’.  After two more unsuccessful countdowns I decided to replace the batteries in the launch controller, even though they were new a week ago, in case they shorted out or something.  The next attempt was successful , with a good flight but the parachute to

A Born Again Rocketeer is Back

Image
After a long (~18 year!) hiatis, I've started building and launching model rockets again. Much of my original rocket fleet is still memorialized via the Internet Wayback Machine at: http://web.archive.org/web/20091022073032/http://geocities.com/lhelseth/LarrysFleet.html  and reposted here on LARRY'S FLEET . I had a lot of kits purchased in the early 2000's waiting to build, including one that was partially built and set aside. I decided to first finish that rocket, then build a couple of kits to get back in the swing of things before moving on to some "scratch" built rockets (modified from legacy plans using available parts, hand cut fins, etc.). Estes Executioner  - This was an Estes kit, model #1951, listed as a skill level 3, that was partially built in ~2004 (needed fins sanded & attached).  This is a 39" X 2.6" rocket that flies on 24 mm D12 or E9/E15 engines.  After glueing the through-the-wall fins and launch lugs, I filled the fins using